

What you will learn
This guide shows how to plan a VMAI Mask & Crop pass before you render. Instead of dragging a mask at the last minute, you will decide what should remain visible, what should be hidden, and which options make the edit easier to review.
You will learn how to choose:
- rectangle, ellipse, or polygon masks
- outside blur versus outside crop
- feathering and mask inversion
- the final review order before spending Credits on a render
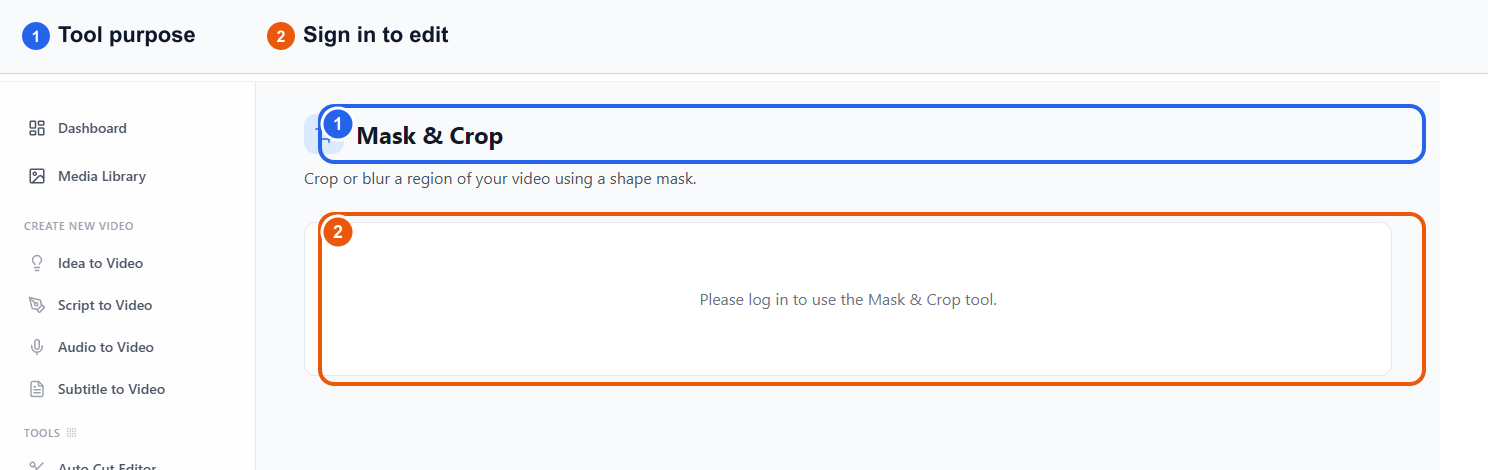
The image above is a real public VMAI Mask & Crop entry screen. The public page shows the tool purpose and sign-in requirement. After signing in, the editor uses the uploaded video's first frame so you can place the mask and choose render options.
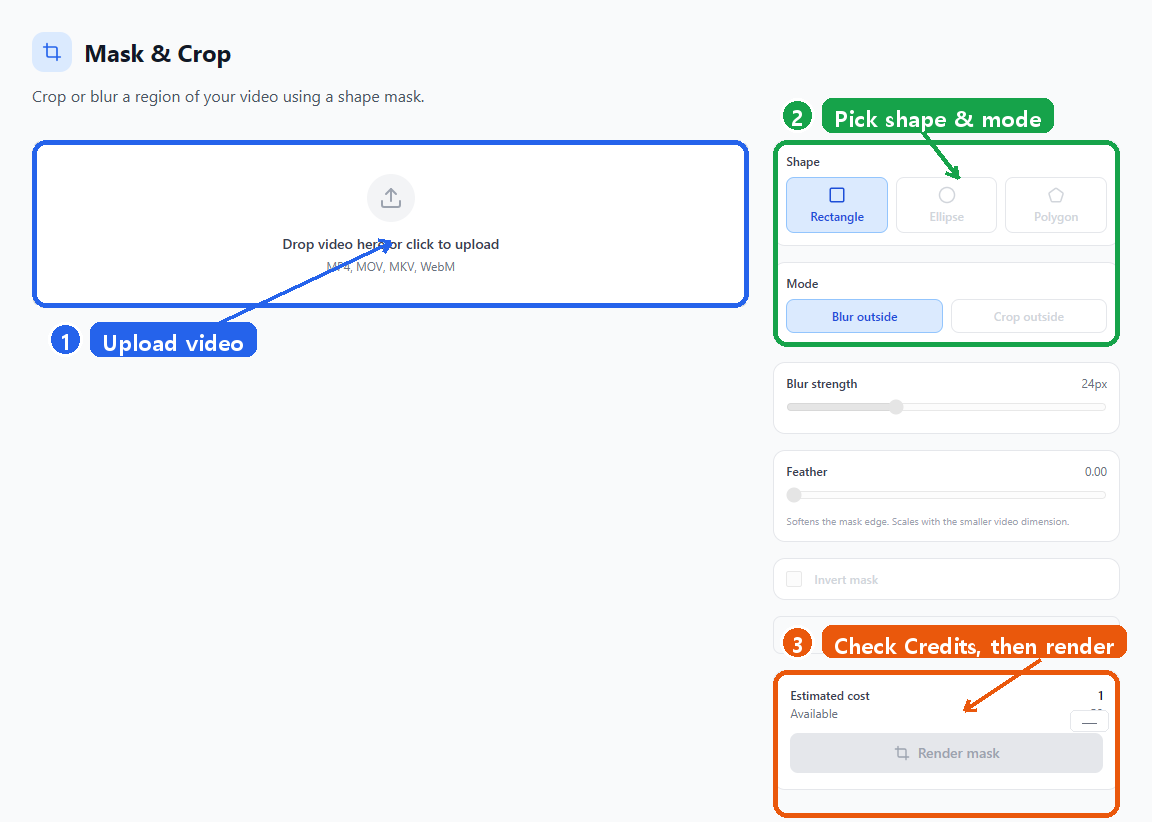
After signing in, you start by uploading a video, then use the right panel to choose the shape, mode, feathering, and inversion options. The final render card is where you check the estimated cost and available Credits before rendering. The account-specific available Credit value is masked in this public screenshot.
Step 1: List the information you need to protect
Blur and crop may look like visual effects, but in a publishing workflow they are really a review step. Start by writing down what cannot appear in the final video.
Common examples include:
- emails, names, notifications, or project names in screen recordings
- bystanders or license plates in the background
- browser tabs, address bars, or toolbars that are not part of the lesson
- unreleased settings or private values in a product demo
- extra space that should be removed for a short-form crop
This list tells you where the mask should go and whether blur or crop is safer.
Step 2: Choose blur or crop before adjusting the shape
The main decision in the Mask & Crop tool is the mode: outside blur or outside crop.
Use outside blur when the original composition should stay, but the background or surrounding detail should become less readable. This is useful when the subject, product, or hand movement should stay clear while the rest of the frame becomes less distracting.
Use outside crop when the frame should be narrowed to one important area. This is useful for removing browser chrome, focusing on a card or document, or reframing a screen recording.
Do not start by asking whether the blur looks nice. Ask whether the viewer can still see the information that matters.
Step 3: Match the shape to the target
The shape choice controls how fast the edit is to review.
| Shape | Best for | Watch out for |
|---|---|---|
| Rectangle | screen recordings, documents, cards, toolbars | make sure sensitive details are not left outside the corners |
| Ellipse | faces, products, centered subjects | may add extra empty space around text or straight UI |
| Polygon | signs, hands, irregular objects, busy backgrounds | too many points can slow down revisions |
If you are new to the tool, start with a rectangle. Switch to an ellipse or polygon only when a simple box hides too much or too little.
Step 4: Add feathering after the protection is already clear
Feathering softens the mask edge. It can make the edit feel more natural, but too much feathering can reveal the edges of the detail you meant to hide.
Use this order:
- Keep feathering near zero while you place the shape.
- Confirm the protected information is fully hidden.
- Raise feathering only if the boundary looks too harsh.
- Re-check text, faces, and license plates after changing it.
Feathering is not the protection layer. It is a finishing adjustment after the mask already does its job.
Step 5: Compare inversion when the target is small
Mask inversion can feel confusing at first because it flips the meaning of the shape. It is helpful when a small area needs to be hidden while the rest of the screen stays visible.
For example, if only a notification in the top-right corner should disappear, draw a small shape around it and compare the inverted state. If the product should stay sharp while the background is blurred, draw the shape around the product and keep inversion off.
Think of inversion as a question: is the shape describing what should stay, or what should be hidden?
Step 6: Set your render checklist before spending Credits
Before rendering, check the estimated cost and available Credits in the tool. Then use a short quality checklist:
- Did every sensitive detail make it onto your review list?
- Are subtitles, products, hand movements, and necessary UI labels still readable?
- Is the blur area too wide for the message?
- Does the crop still preserve a clean aspect ratio and composition?
- Does the inversion state match your intent?
A good Mask & Crop pass is not just a cosmetic edit. It is a way to protect the video, keep the viewer's attention on the right area, and avoid unnecessary re-renders.
Tutorial Complete!
You've read this tutorial. Move on to the next step.
Found this tutorial helpful?
Subscribe to get notified when we publish new tutorials and guides. No spam, unsubscribe anytime.
Comments
Please login to leave a comment
LoginNo comments yet. Be the first to comment!